BMinkz
Lash Manual
Advanced Eyelash Extension Training
Table of
contents
CHAPTER 1:
CHAPTER 2:
CHAPTER 3:
CHAPTER 4:
CHAPTER 5:
CHAPTER 6:
CHAPTER 7:
CHAPTER 8:
CHAPTER 9:
CHAPTER 10:
- Lash Extensions 101
- Supplies
- Setting Up Your Space & Supplies
- Sterilization, Disinfecting & Sanitization
- Self-Care
- Lash Growth Cycle
- Lash Diameters, Curls & Lengths
- Designing the Perfect Set
- Prep
- Retention Killers
- Quiz/Case Studies
- Process
- Application
- Allergies
- Removals
- Refills
- Pricing
- Marketing
- Glossary

CH 1
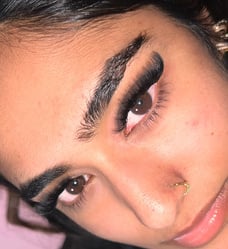
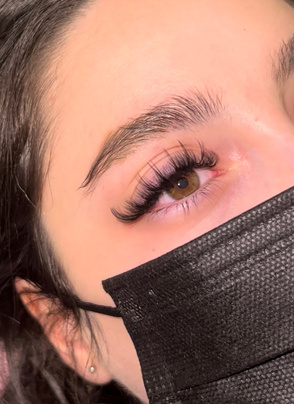
Lash Extensions 101
What Are Lash Extensions?
Eyelash extensions are semi-permanent synthetic fibers used to create more volume while lengthening and extending the natural eyelashes. The process can take the technician anywhere from 2-4 hours for 90% - 100% coverage.
Classic Lashes:
Hybrid Lashes:
Volume Lashes:
Mega Volume Lashes:
1 single extension is placed on one natural eyelash (1:1)
An equal mix of fans and cLassic Lashes (10:1, 1:1)
Customized handmade fans are designed and made for each natural eyelash and applied on anywhere from 2-10lashes per natural lash (10:1)
Similar to standard volume, however up to 20 false lashes per natural lash (20:1)
Are Lash Extensions Safe?
Since the extensions are applied to the existing natural lashes, away from the base, and don’t touch the skin, the natural lash is not harmed. The eyelash extensions do not force the natural lash to shed or break - unless improperly applied or an extension that is too heavy for the natural lash is used. If not properly applied, eyelash extensions can be extremely damaging to the natural lash and may cause permanent damage. This is why it is incredibly important to focus on correct isolation & placement.
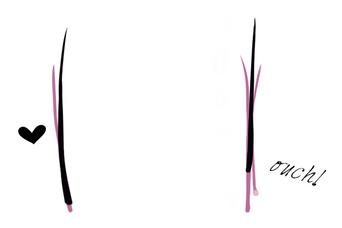

Attached to 1
natural lash
Attached to 2
natural lashes
Lash Extensions 101
How Are Extensions Applied?
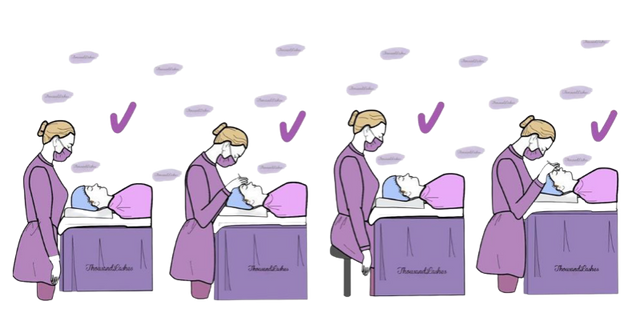
Lash Professionals will use formaldehyde-free professional eyelash extension adhesive to apply a single faux eyelash to each of your natural lashes (or a custom-made fan of several lashes in the case of a Volume Lash set). The size of each extension will be selected and custom matched to each natural lash to ensure that it is a safe length and weight for the natural lash that it is being applied to. Lash Professionals are trained to create a custom design specific to your natural lashes and desired outcomes. The natural lashes are then carefully isolated, this step is followed by gluing the fan or lash to the top, side, or bottom. Finally, the lashes are to be sealed to complete the service.
Complete
Isolate + Apply
Mist + Bond

How Long Do Extensions Last?
Ideally, lashes will last 2-4 weeks before a fill; however, the longevity ultimately depends on the client. The retention will depend on several factors, the biggest one is how well the client maintains their lashes. To maintain lashes, fill appointments are necessary every 2 to 4 weeks to replace the lash set that has shed or outgrown naturally. I always advise that after the initial set of extensions, a fill should be prebooked at 2 weeks as they may have lost or shed more than normal due to the time of their shed cycle. Factors that can affect the retention from the client's end include:
- Consistent use of makeup/mascara
- Not washing their lashes daily
- Oily Skin
- Sleeping on their face
- Skincare/oily products
- Very hot showers
Supplies
MUST HAVES

CH 2
- Lash Trays
- Tweezers
- Gel Pads
- Tape
- Lash Glue
- Primer
- Bonder
- Microswabs
- Nano mister
- Mini Fan
- Lighting
- Lash Bed
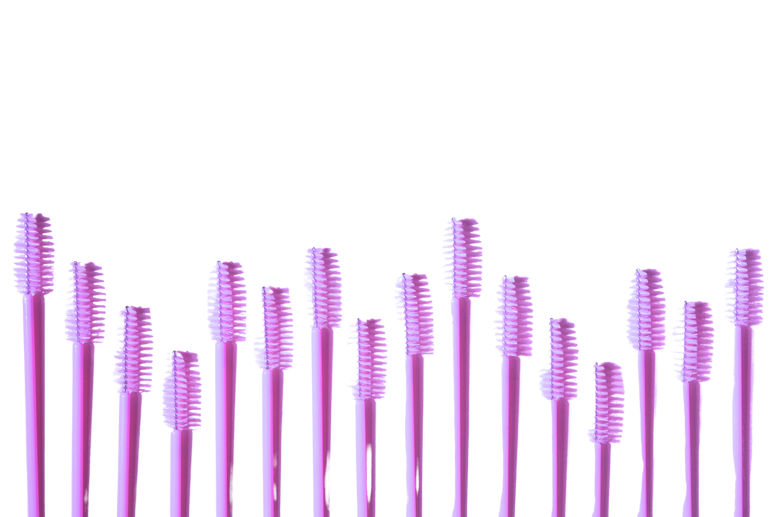
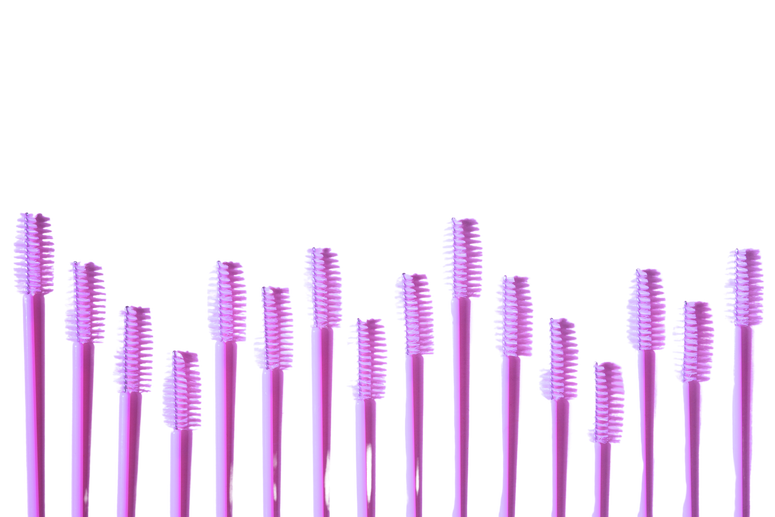
- Spoolies
- Lip Brush Applicators
- Lash Cleanser
- Lash Cleansing Brush
- Squeeze Water Bottle
- Hygrometer
- Lash Cart/Organizer
- PreEmpt/Alcohol/Bleach/Barbicide
- Sterilization Tray
- Glue Ring/Jade Stone
- Lash Tiles
- Remover
- Consent Forms
- History Forms
Setting Up Your Space
ESSENTIALS
- Lash Bed/Recliner
- Hydraulic Stool/Chair
- High Level Disinfectant
- Lash Cart
- Lash Pillow
- Humidifier
- Ring Light/Stick LED
- Disposable Dental Bibs


Setting Up Your Space
RECOMMENDED
- Framed Certificate(s)
- Mirrors
- Lash Bed Cover
- Rug
- Decor
- Guest Seating


Sterilization, Disinfecting & Sanitization
Correctly cleaning surfaces, tools, as well as equipment is the number 1 priority when running a lash business. As a lash professional it is up to you to reduce bio-burden as much as possible - this ensures your client will have no infection from you.
1

IMPORTANT DEFINITIONS:
BIO-BURDEN: The total # of viable bacteria that have yet to be sterilized
SANITIZATION: Reducing the number of active microbes on surfaces
DISINFECTING: Eliminating all germs and bacteria beyond sanitization
STERILIZATION: Completely killing all bacteria, microbes, fungi, and viruses
LOW-LEVEL DISINFECTION: Noncritical, comes into contact with intact skin
INTERMEDIATE-LEVEL DISINFECTION: Mix of semi-critical and noncritical items
HIGH-LEVEL DISINFECTION: Comes into contact with non-intact skin and/or mucous
Self-Care
Self-care is a crucial component of working in the beauty industry. When lashing, there is an increased risk of getting Carpal Tunnel Syndrome, poor vision, long-term lung problems, as well as a weakened back. In turn, lash technicians have to take certain precautions in order to preserve the longevity of your lash career and well and remaining healthy. It is extremely important to maintain your health in order to be a lash artist for several years. Investing in the right products now, will save you a lot of pain in the future (chairs, tweezers, etc) .
- Correct Posture
- Sitting at The Correct Height
- Wearing a Filtered Mask
- Holding Tweezers Correctly
- Wearing Magnifying Lenses
- sitting up straight, not hunching or sitting in awkward positions
-when the bed is too low, your wrists and neck wil be severely strained
- wearing an N95 filtered mask to prevent inhaling the fumes from the glue
- not pinching to hard, finding the sweet spot
- wearing specialty lenses to avoid straining your eyes
Self-Care
Medical History & Refusing Clients
- Frequent Cysts/Styes
- Alopecia
- Bells Palsy
- A condition that may cause you to continuously open your eyes
- Skin Trauma Around the eyelid
- Trichotillomania
- Blepharitis
Medical Related Cases that Require A Doctor's Note:
- Chemotherapy (must wait 6+ months)
- Dry Eyes Syndrome
- Any eye/eyelid-related surgery
- Glaucoma

Bluntly said, some clients are just not candidates for lash extensions. It is not in your hands to try to get around it, if they answer truthfully and are prone to any symptoms listed above, kindly deny them of the service. Moreover, if a client is still a candidate for lash extensions but treats you poorly, refuse them service. As a business owner, you will experience a few poor encounters it is inevitable. You will experience clients who talk down to you or try to "blast" you on social media. At that point, you do not need to keep trying to impress them, just fire them as client for your own well-being.
CH 3
Lash Growth Cycle
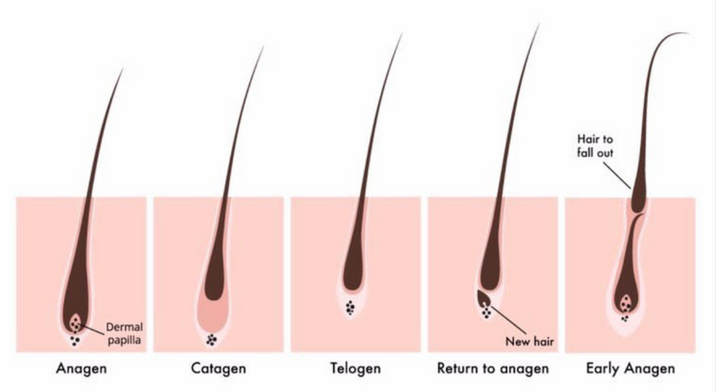
There are 3 stages of the lash cycle that occur over the course of 3 months. The baby stage is when there is active growth - called the "Anagen" stage - which lasts for approximately 8 weeks. The next stage is the "Catagen", also known as the "transition" phase. This is when the natural lash detaches from the blood supply and no longer grows. The final stage is the "Telogen" phase. This is when a baby lash begins to grow and will shed the prior lash. The lash growth cycle is lengthy - to be a reliable lash tech you need to prioritize lash health over money - ultimately being able to turn away clients when their lashes aren't suitable rather than taking them for the money

REMINDER:
It is crucial to remember you are NOT able to lash "baby lashes", this will ruin the growth cycle and ultimately damage the hair folicle.

REMINDER:
3-7 natural lashes falling out per eye per day is normal, due to the season more or less can be normal - this is exemplified during "fall shed"
Lash Diameters, Curls & Lengths
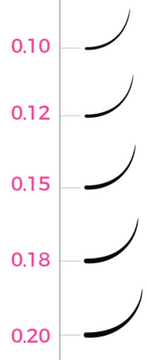
Classic Diameters:

0.10mm, 0.12 mm,
0.15mm, 0.18mm, 0.20mm
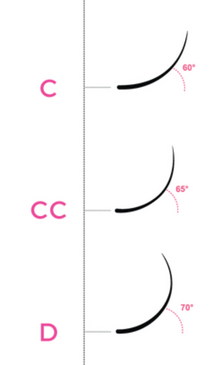
Classic Curls:
C, CC & D
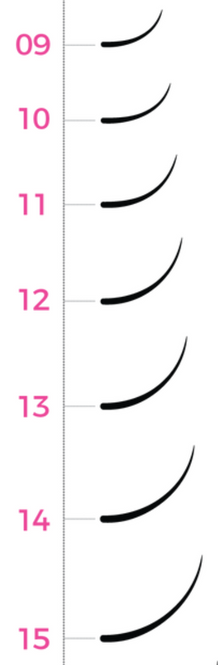
Classic Lengths:
Most common:
9mm-15mm

Diameter and Length are VERY different, diameter refers to the width of the lash at its thickest point (not the pointed tip). The length refers to how long the false lash is.
Lash Diameters, Curls & Lengths
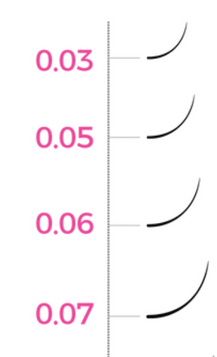
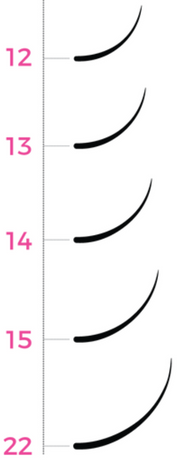
Volume Diameters:
0.02mm, 0.03mm,
0.05mm, 0.06mm, 0.07mm
Volume Curls:
C, CC & D
Volume Lengths:
Most common:
12mm-25mm
Lash Diameters, Curls & Lengths
DIAMETERS - CHEAT SHEET
Acceptable Classic Diameters:
0.15, 0.18, and 0.20 are the most common individual lashes to apply. The thicker the natural, the higher the diameter of the false lash you can apply. It is important to learn how to differentiate natural lashes and understand what diameter is appropriate to apply.
Acceptable Volume Diameters:
0.05, 0.07, and 0.10 are the most common volume lashes to apply. The thicker the natural, the more false lashes you can apply. These diameters are also used in hybrid sets - commonly the fans are made of 0.07 and the remaining 50% is full of 0.18 indivisual lashes.
Acceptable Mega Volume Diameters:
0.02 and 0.03 are the most common mega-volume lashes to apply. The thicker the natural, the more false lashes you can apply. 0.03 is the most common to apply and looks very fluffy and full.
Lash Diameters, Curls & Lengths

DIAMETERS - CHEAT SHEET
Acceptable Classic Diameters:
-1;1, thinner lashes
0.15
-1:1 - normal lashes
0.18
0.20
- 1:1 - only for thick lashes
Acceptable Volume Diameters:
0.05
- Max 10 lashes per natural lash
0.07
- Max 6 Lashes per natural lash
0.10
- Max 2 Lashes per
natural lash
Acceptable Mega Volume Diameters:
0.02mm
0.02
- Max 25 lashes per natural lash
0.03
- Max 20 Lashes per natural lash
0.03mm
Lash Diameters, Curls & Lengths
Curls:
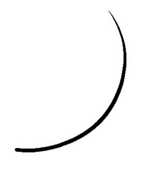
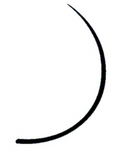
C, CC, and D curl are the most common when creating classic sets. My personal favourite to work with is C/CC curl. C curl is proven to have better retention due to the curl being straighter so there is more room to adhere to the natural lash. D curl creates a more dramatic and full-looking set; however, the other curls generally have better retention. L & M curl are gaining popularity, L curl creates the "fox eye" look, while M curl is a more relaxed C curl. When a client has naturally downturned straight lashes you need to use D curl unless the client requests otherwise, if you use c curl the lashes will barely show - it'll look more like an "eyeliner effect". It is important to note depending on the brand the curl may vary. Try to stick with same brand to ensure uniformity.
C Curl
CC Curl
D Curl


Lash Diameters, Curls & Lengths
Classic Lengths:
When creating classic sets it is important to be able to assess the natural lashes. On average, natural eyelashes are 10mm long. This means the maximum length of extensions you can apply are 13mm. Due to the density of individual lashes, the longer the false lash is, the heavier it is as well. Arguably, classics are the hardest set to master - you need to get directioning, placement, as well as coverage down before moving onto other services.


+3mm
+3mm
+3mm
Lash Diameters, Curls & Lengths
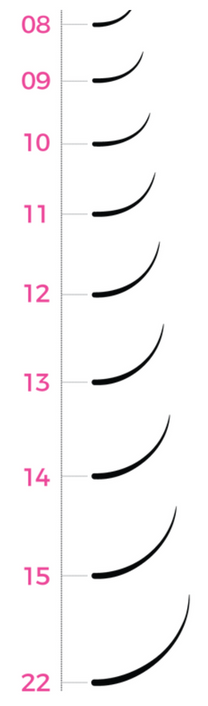
Volume Lengths:
When creating volume sets, you're able to create a more full and dramatic look. Using different diameters (weights) you are able to use longer lengths. You can go the longest 22 mm on healthy lashes. The fans should be between 2-10 false lashes - you can eyeball this.
Light Volume/Hybrid Fans:
- Between 2-6 false lashes in the fan
Heavy Volume:
- Between 7-10 false lashes in the fan
Short Lengths:
- 7-10mm
Medium Lengths:
- 11-15mm
Long Lengths:
- 16-22mm
-12mm
+12mm
+12mm
Designing the Perfect Set
Doll Eye

Cat Eye
Squirrel Eye
Open Eye
Designing the Perfect Set
Basic Mapping
--------
--------
13
--------
-------
14
-------
10
11
12
------
13
12
Squirrel Eye
-------
12
11
-------
-------
13
14
Cat Eye
-------
-------
-------
13
-------
13
14
12
12
Doll Eye
9
-------
12
14
-------
12
-------
-------
-------
10
9
-------
10
Open Eye
Designing the Perfect Set
Wispy/Strip Lash Mapping
What Is The Difference Between Normal, Wispy and Strip Lash Volume?

UNIFORMED VOLUME
STRIP LASH VOLUME
WISPY VOLUME
As previously shown, the basic mapping divides sections equally and uses one length in each section. On the contrary, both wispy and strip lash sets add in longer "spikes" to create an uneven and effortless look. These sets add about 6-20 spikes per eye depending on how wispy the client requests. The only difference between a wispy and a strip lash set would be the length of the spike. 2-3 mm longer spikes would be used in wispy, 4-6mm longer is used in striplash.
BASIC CAT EYE MAPPING - WISPY VS STRIPLASH
+2mm
+2mm
+4mm
+4mm
+2mm

+2mm
+4mm


+4mm


VS
Wispy Map
Note: you can add more spikes and add spikes of different lengths, wispy sets are meant to be a little messy.
Strip Lash Map
Note: Strip Lash sets are meant to be clean, spikes must be directioned and lengths must compliment eachother
Designing the Perfect Set
Common Eyeshapes + Ideal Style
Hooded Eyes

Round Eyes

- Squirrel Eye
- Doll Eye
- Natural Eye
- Cat Eye


- Squirrel Eye
- Cat Eye
- Natural Eye
- Doll Eye
Up-Turned Eyes

- Squirrel Eye
- Cat Eye
- Natural Eye
- Doll Eye
NOTE: "normal eyes" (not turned in any direction & average size) are suitable for all styles, use your client's preference to determine your lash map.
Preparations
Adhesive
CH 4
Lash glue is extremely crucial and sensitive. You need to ensure your humidity is accurate as well as your temperature. The following recommendations will ensure you have good retention and that your glue works effectively. When the humidity/temperature is too high, it will speed up the dry time of the glue, possibly creating a false bond between the false lash and natural lash causing the lash to fall off within a few days. Low humidity will cause the glue to take longer to dry, create "stickies", and it could also cause the glue to shock cure and turn white. Although the glue will dry a few seconds after attaching, the glue into fully cure until 24 hours after the service. Despite this, you can use certain techniques to speed up the cure time. Nanomisting at the end of the set will "shock cure" the glue, it will not turn white when using a nano mister because it is a very controlled amount of water misted onto the lash. Additionally, you can use a bonder, which will also flash cure the glue. I use both, many just use one or none.
REQUIRED STEPS:
- Shake your glue for 1-2 minutes before dispensing or use a glue shaker for 20 seconds
- The temperature of your environment should be between 17°-23° and the humidity should be 40-60%
- Store glue in an airtight container
- Change your glue dot every 20-30 minutes (shake for 30 secs before using)
- Do not store the glue in the fridge
- Replace the glue bottle every 4-6 weeks
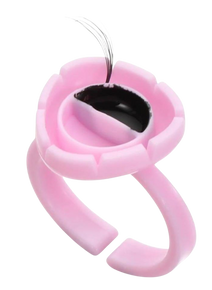
- Always neutralize the glue after using it to avoid fires (add water to your glue ring)
Preparations
NOs
Despite lashing being relatively straight forward when you get the hang of it, there are definite "NOs" that you should follow in order to satisfy clients and protect yourself. These tips include:
- DO NOT recommend any cleanser other than lash cleanser to your clients, this includes baby shampoo & face wash, these are a potential threat to retention
- DO NOT put bonder in your nanomist to "short cut" it becomes ineffective
- DO NOT put the glue dot near the clients face (leaving jade stone on forehead) it puts your client in danger
- DO NOT use inadequate lengths/diameters just because you ran out, refuse the service
- DO NOT post client pictures without their consent
- DO NOT begin service without the client signing a consent form
- DO NOT have any pets in the room of service
Retention
Killers
NOTE: If a client's lashes have a lot of gapping within 48 hours it is most likely the tech's fault - products will not ruin retention that quick, if the client is picking their lashes you'll be able to tell by the # of NLs
Lash Tech's Fault
- Improper isolation
- Improper placement
- Extremely low/high humidity
- Not enough glue
- Wrong dry time
- Not shaking glue before use/not changing glue dot
Client's Fault
- Oil based eye makeup
- Steaming hot showers/steam showers/saunas
- Not washing the lashes everyday
- Baby shampoo/Micellar water as lash cleanser
- Coming to appointment with dirty lashes
- Picking/Playing with lashes
- Sleeping on face
CH 5
Quiz/Case Study
You can use Lysol/Clorox wipes to clean your lash tweezers.
○ True
○ False
If the client has "droopy" eyes and wants a cat eye style, you should do a cat eye map.
○ True
○ False
Humidity affects how well the glue performs.
○ True
○ False
0.07, 0.10 & 0.25 are the ideal diameters to use when completing a classic set.
○ True
○ False
A client comes in for a long mega volume set - they give you a map that their previous tech used, and they request lengths 20-25mm. Are you able to mimic the set exactly?
○ Yes, as long as their natural lashes are strong and thick enough
○ No, the lengths are too long/heavy and the set would damage their natural lash
Quiz/Case Study
The "baby stage" of natural lash growth is called the "catagen stage"
○ True
○ False
A client comes in after signing all the intake forms, you realize their lashes are very sparse and ask them AGAIN about their medical history, they admit they finished chemotherapy 3.5 months ago. Do you continue the service?
○ No, extensions will permanently damage their natural lashes
○ Yes, they agreed to the service and signed all of the intake/medical forms
For a "doll eye" map, the lengths range from the shortest to the longest back to the shortest.
○ True
○ False
You can suggest baby shampoo to your clients as lash cleanser.
○ True
○ False
Grade: /9
Process
CH 6

ALWAYS PERFORM A LASH BATH, lash baths are extremely important to ensure great retention. Pump 1 pump of lash cleanser onto each eye, then use a squeeze bottle to remove all of the cleanser and oil
FAN & APPLY GEL EYEPADS + TAPE, adding tape on top of the pads helps with any baby bottom lashes getting stuck to the false lash
PRIME (if nessessary) - clients with dry hair & skin do not need primer as it will dry out their lashes too much and ruin the bond of the false lash
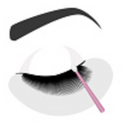
BEGIN APPLICATION - create handmade fans or pick up and individual lash and begin to isolate, when isolated you can dip into the glue and apply the false lash to the natural. keep the tweezers isolating for 3-4 seconds to ensure no stickies
COMPLETING THE SET - check for any lashes stuck to the eye pad, bond + mist, wait 3 minutes then you are able to remove the gel pads
Application
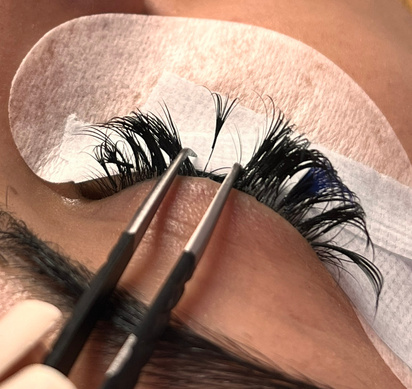
FANNING
Types of Fans
REMINDER: All fans require a thin and snatched base to maintain lash health
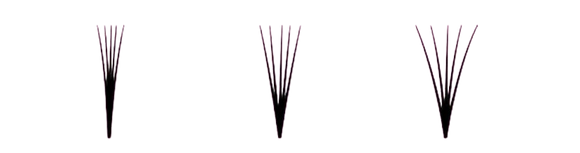

Narrow: creates a "darker" and "denser" looking set, you can use this type of fan when the client desires a dark lash line
Normal: this form of fan is used in hybrid and lighter volume sets.
Wide: creates a "wispier" and "fluffier" looking set, these types of fans are normally used when clients have sparse lashes or client wants a fluffy mega volume set
Spike: creates a textured looking set, these types of fans are normally used in Strip Lash and Wipsy sets, you can also use them to create a fuller classic looking set
Application
FANNING
How to Fan
PINCH TECHNIQUE:
Using this technique, you will pick up 3-20 lashes and pull them towards you. When your lashes are in a perfect rectangle you can then use the tips of your thumb and index fingers toward your chest, so they're perpendicular to you. Depending how much pressure you apply while pinching determines how wide the fan will be.
FANNING RING:
This technique is easier to pick up on and will significantly speed up your sets; however, this technique is not preferred as it becomes very hard to wrap this natural lash. This technique requires you to crystalize the fan (creating a fan then dipping again to apply once the glue has dried). Lash crystalization allows you to pre-make fans before the appointment if you are more comfortable with that method
SPIKE:
To create a spike no fanning is required. As some trays and tweezers are made to assist fanning, creating spikes can be difficult at first. To create a spike you will need to pick up the lashes at 90° so the lashes are in a rectangular bunch, you then dip immediately and apply as you would a classic lash.
Application
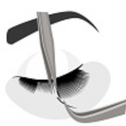
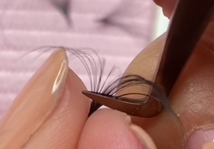
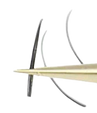
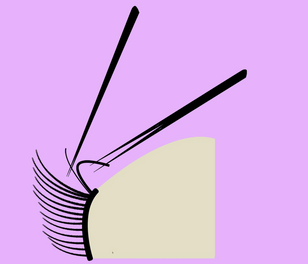
ISOLATION
Isolation is one of the most important parts of the lashing process. Isolating is when you use your tweezers to separate one NL from the others. Sticking a false lash to multiple NLs will cause damage to the natural lash such as traction alopecia. When isolating you have to attach the false lash and keep your tweezers separating the lashes for a few seconds. Depending on how quickly your glue dries will vary how long you have to keep the lash isolated. You can isolate with two kinds of tweezers, there are straight tweezers or curved isolation tweezers (as shown in the images below). Depending on your trainer, isolating with your pinky nail may be suggested, depsite this I warn to please do not do this, it can be incredibly unhygenic.
Proper
Isolation
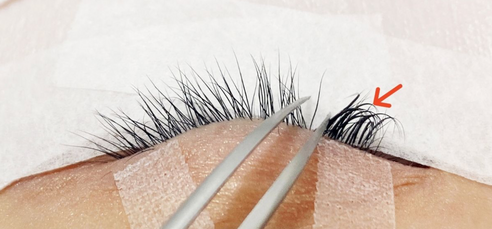
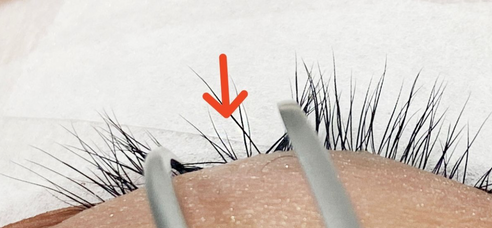
Poor
Isolation
Application
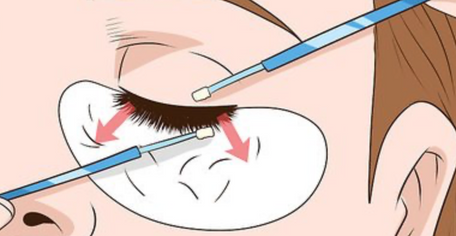
NL & Placement
Correct placement is crucial when trying to achieve great retention. As a beginner, you should focus and consistently practice placement. 50% of lash retention issues are due to poor placement. When lashes do not have correct placement the bond isn't as strong as it could be which will result in the lash to fall off within a few days. You will find different clients will require different types of placement. There are 3 types of placements, top, side as well as bottom. Depending on the NL, you will need to place the extensions differently to achieve the best retention. Those with curlier lashes will need bottom placement (false lash placed under the natural lash) and clients with downturned lashes will need top placement (false lash placed on the top). For majority of your clients you can use top or side placment.
Application
NL & Placement
Brittle Lashes
Noticable Gap
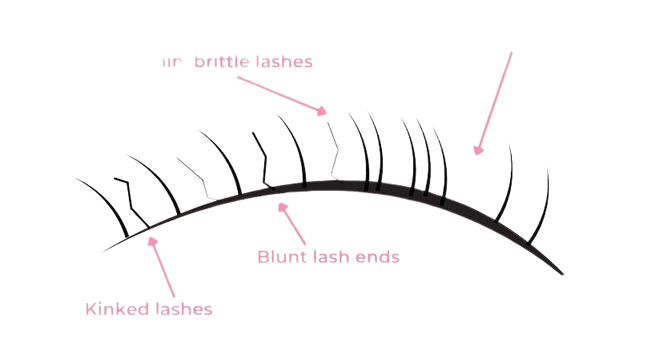
Lashing natural lashes that are not suitable for extensions will result in poor retention as well as damage to the natural lash. Many clients who have brittle lashes are not suitable candidates to get this service. As you service more clients you will notice a few clients will come in for fills with singed lashes, this is a result of smoking too close to the lashes or going too close to an open heating element such as an open oven. When you come across a case of singed lashes you need to remove them immediately, SImilarily if a client comes in for a fill and has noticeable gaps due to pulling or plucking their lashes, it is best to remove their lashes and refuse further service and they are damaging their lashes and can potentially blame you or your work for it.
Application
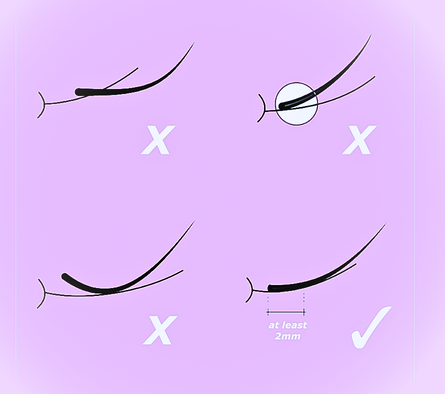
GLUE USAGE


Inserted the lash too high

Inserted the lash too low
Inserted the lash perfectly
Glue usage and the dip are extremely important. Always aim to dip the lash in the middle of the glue and ensure to pull the lash out at a moderate speed. Pulling the lash out of the glue rapidly will result in a "glue blob" at the end of the lash. Whether or not the glue has good retention, if you're not using the glue correctly, it will automatically ruin your set.
Allergies
CH 7
Signs & Symptoms
Allergies to lash glue is extremely common. They can develop over a period of time even while getting extensions (irritation becomes gradually worse or even just in one eye). the easiest way to tell if it is an allergy is if the reaction appears within 72 hours of getting a fresh set. You are not a doctor, you cannot diagnose a client with an allergy. You may suggest it looks like an allergy but you have to encourage the client to see a medical professional. To avoid possible cases you can offer a patch test (you can add a fee if you'd like), a patch test consists of performing all steps of the standard service; however, you only apply 10 individual lashes per eye rather than 100% coverage, you then wait for 72 for any symptoms.
Blepharitis is a product of poor aftercare. The client isn't maintaining or cleaning their lashes resulting in a buildup of oil and clogged lash follicles. This reaction takes time to form (weeks of unmaintained lashes). This bacteria can also be transferred by the provider. If you are not appropriately sterilizing and disinfecting your equipment, cross-contamination is highly likely to infect your client's eyes. Additionally, this could lead to a lawsuit against your company, so as a lash professional please always hold cleanliness as your #1 priority. Lash mites may also occur. this again happens when the client is not washing their lashes. Improper aftercare will result in skin-colored bugs. At that point, you may refuse service.
Commons Signs & Symptons
- Itchiness
- Soreness
- Swelling
- Redness
- Irritation
- Tearing
Removals
CH 8
2 Main Methods of removal, they are used differently for different circumstances. Both are equally effective. A "full removal" requires lash remover while the "banana peel method" does not require any additional material.
Banana Peel Method:
Only use this method during refills to remove the outgrown lashes This method allows you to remove lashes in an efficient manner. You perform this by grabbing the natural lash with your isolation tweezer, then grabbing the false lash with your fanning tweeze, you are to then carefully "pull back" the false lash in order to release the adhesion. In rare circumstances, you may find yourself having to use this method if a client comes back with an extreme allergy.
Full Removal
Using a professional gel, cream or liquid remover, you generously apply it to the base of all the false lash bonds and leave for the directed time. After waiting the required time, you can begin to "loosen" the bond by using micro swabs and begini to lift the bases - they should slide off.
Refills
Refills require one more additional step than a normal set, this step is called "removing grown-outs"
What Are Grown-Outs?
Grown-outs are a natural part of the lash cycle, as the natural lash grows, so does the extension that is attached. Every fill appointment will require the technician to remove the grown-outs using the "banana peel method". Not every lash will need to be removed, only select ones caused by slipping or rapid growth cycle. If a client comes in with majority grown-out lashes you should advise them to pre-book their fills earlier.
3+ Week Grown Out
After Fill
Pricing
CH 9
Pricing is dependant on the area you are offering the service. Pricing as well as cost drastically differ from city to city. It is important to note that just because you are a beginner does not mean you should sell yourself short. The cost of supplies can be expensive so you need to charge for the supplies aas well as your time. When starting out, you should create your price list around prices you are looking to charge when you gain more experience & clientele - you can then run promos you so you can avoid connstantly uping your prices.
Marketing
The way you market and promote yourself with determine how successful your business will be. Creating social media account is a MUST, that being said, you need to take advantage of the features that come with social media accounts. Try to refrain from buyer followers.
Followers ≠ Clients
The best way to gain clientele is through word of mouth and referrals, to do so, you need to provide excellent customer service as well as a great experience.
Ways to Promote:
- Social Media Ads
- Loyalty Program
- Referral Program
- Facebook Groups
- Instagram Reels
- Tiktok
- Giveaways
- Commenting & Staying Active on Other's Posts
Glossary
CH 10
KEY WORDS
♥ Bio Burden: The total # of viable bacteria that have yet to be sterilized
♥ Blepharitis: Dry, crusty, and itchy infection caused by oil buildup (dirty lashes)
♥ Classics: 1 False lash to 1 Natural Lash 1:1
♥ Diameter: The width of the false lash
♥ Disinfect: Eliminating all germs and bacteria beyond sanitization
♥ Hybrid: Equal mix of fans and individual lashes in a set
♥Isolation: Separating the natural lashes using tweezers
♥ Lash Mites: Eyelash mite outbreak on the base of extension due to improper aftercare
♥ Length: How long the lash is
♥ Mega Volume: 11-20 false lashes in a fan
♥ Sanitization: Reducing the number of active microbes on surfaces
♥Sterilization: Completely killing all bacteria, microbes, fungi, and viruses
♥ Removal: Detaching all the false lashes from the natural lashes
♥ Retention: How well the false lash stays adhered to the natural lash
♥ Volume: 2-10 false lashes in a fan